This is part 2 demonstrating how to upload a spreadsheet of
bounced emails addresses to modify contacts.
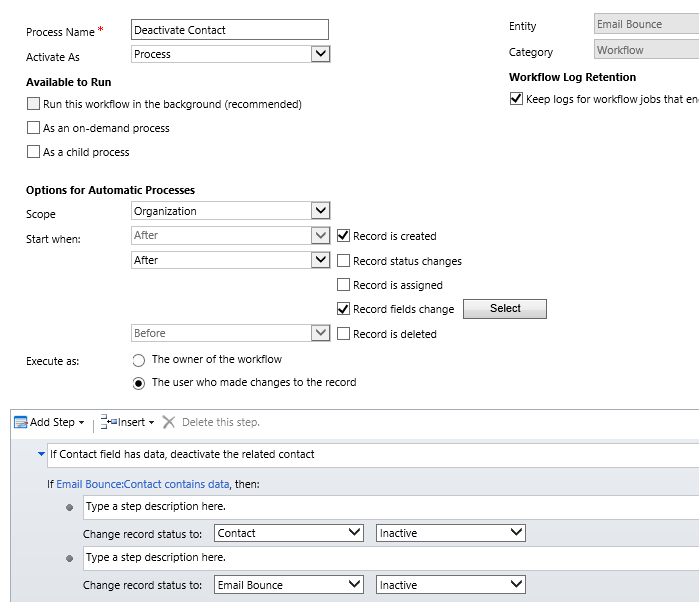
In part 1, we created an Email Bounce entity and a Real-Time Workflow.
The first step is to download the Import template. This step is optional and depending on the
scenario. may make it easier (or more
difficult). In this case, it’s going to
make creating the map easier, so let’s get started. Navigate to your entity and click the Import
Data – Download Template for Import and save the XML file.

Most of the time your computer will not realize this is an
Excel file, so to open the XML file, start Excel and use File – Open. Now you can paste your list of email address
into BOTH columns. Save your changes to
a new file (so you can reuse the template next week) and exit Excel.

Start the Import dialog and select your XML file in the
first screen. CRM will recognize that
you want to upload Email Bounce records, but we need to edit the mapping, so
click Edit.

We need CRM to lookup our Contacts using the email address,
but it doesn’t do that be default, so we have to add it to the Lookup reference. Click on the little icon next to the Contact
field and select the Email field from the list of Contact fields.

Click Next until you get to the Finish screen. Tip: give this Mapping a name, so you can
reuse it next time. Click on the “Imports”
link to watch the process unfold.

If you have any errors then you can export the failed rows
and manually process them.

Remember that Mapping we saved, well reusing it is not as
easy as you’d think…when uploading XML files, there’s a strange trick to it. You still have to click the Edit button after
uploading the XML file, but when you get to the Map Record Types dialog, click
Back and you are magically transported to the Select Data Map dialog.

After that, you just click Next, Next, Next…as quick as you
can and you’re finished.